Macflick Tutorial to Batch Import OLM to Zoho Mail on Mac

Mac Outlook supports OLM file for data storage. It stores the data items of users account such as emails, contacts, and calendars. However, the file is only compatible with Mac operating system. And in order to access OLM files in Windows environment, users need to convert OLM files into Windows-supported email clients format. Thereby, most of the users prefer to import OLM to Zoho Mail. It delivers user-friendly interface to manage email messages. To access Mac Outlook emails without any interruption, here are some of the methods mentioned which you can try to batch import OLM files to Zoho Mail at once. Also, we will go through automated solution that will perform the entire task with 100% accuracy.
Why to Import OLM to Zoho Mail on Mac?
Zoho Mail provides many beneficial features as compared to other email services. Some of them are described below –
- Zoho Mail delivers strong security features such as end-to-end encryption and safe email storage.
- By using Zoho Mail, one will be able to access emails easily from anywhere by utilizing any device such as Tablet, Phone, or Computer.
- Zoho Mail offers clean and understandable interface that will help users managing emails and other tasks with ease.
- Includes better collaborative tools with other Zoho Mail applications such as Zoho CRM, Zoho Projects, and Zoho Docs.
- Zoho Mail allows easy organization of the emails and help users storing the same with cloud storage and great sorting tools.
Import OLM to Zoho Mail on Mac – Know Manual & Direct Approach
Manually Import OLM to Zoho Mail on Mac OS
Step 1. Configure Outlook for Mac to Zoho Mail
Step 1. Login to Zoho Mail account to enable IMAP Settings.
Step 2. Now, run Outlook for Mac email application on your Mac OS.
Step 3. Click Tools and select Accounts option.
Step 4. Select Settings from menu and then tap Accounts.
Step 5. Add a new account by choosing Other Emails.
Step 6. Specify Zoho Mail login details in required fields.
Step 7. Select IMAP using drop-down menu.
Step 8. Provide the mentioned IMAP details –
- For business accounts: imappro.zoho.in
- For personal accounts: imap.zoho.in
Step 9. Afterward, select the checkbox of Connect using SSL.
Step 10. Mention smtp.zoho.in in Outgoing Mail Server.
Step 11. Select Override default port box.
Step 12. Set 465 as Outgoing Mail Server Port Number.
Step 13. Tap Add Account to save the configuration.
Step 2. Import OLM File into Outlook for Mac
Step 1. Run Mac Outlook and click File.
Step 2. Select Import and choose Outlook Data File (.olm).
Step 3. Choose the .olm files to import.
Step 4. Tap Next to complete the import process.
Note. Outlook start sync imported files with Zoho Mail by using IMAP Protocol.
By implementing the above steps, you will be able to import OLM to Zoho Mail account. But the process has some drawbacks that you should consider first before executing it.
Drawbacks of using Manual Approach
- Time-consuming process.
- Configuration process will be difficult for non-technical users.
- Not able to maintain email formatting or attachments in few cases.
Directly Import OLM to Zoho Mail on Mac OS
To batch import OLM to Zoho Mail on Mac OS at once, make use of Macflick Mac OLM Converter Tool. The application is simple and easily manageable. All user types can operate the application without any issues and directly import OLM files to Zoho Mail with accurate emails and attachments.
Moreover, the tool possesses many features which are useful in attaining desired results in minimum time. Download the free demo version of the application to test the detailed software processing for free.
Know Step-by-Step Software Working to Import OLM to Zoho Mail on Mac
Step 1. Download and launch the software on Mac.
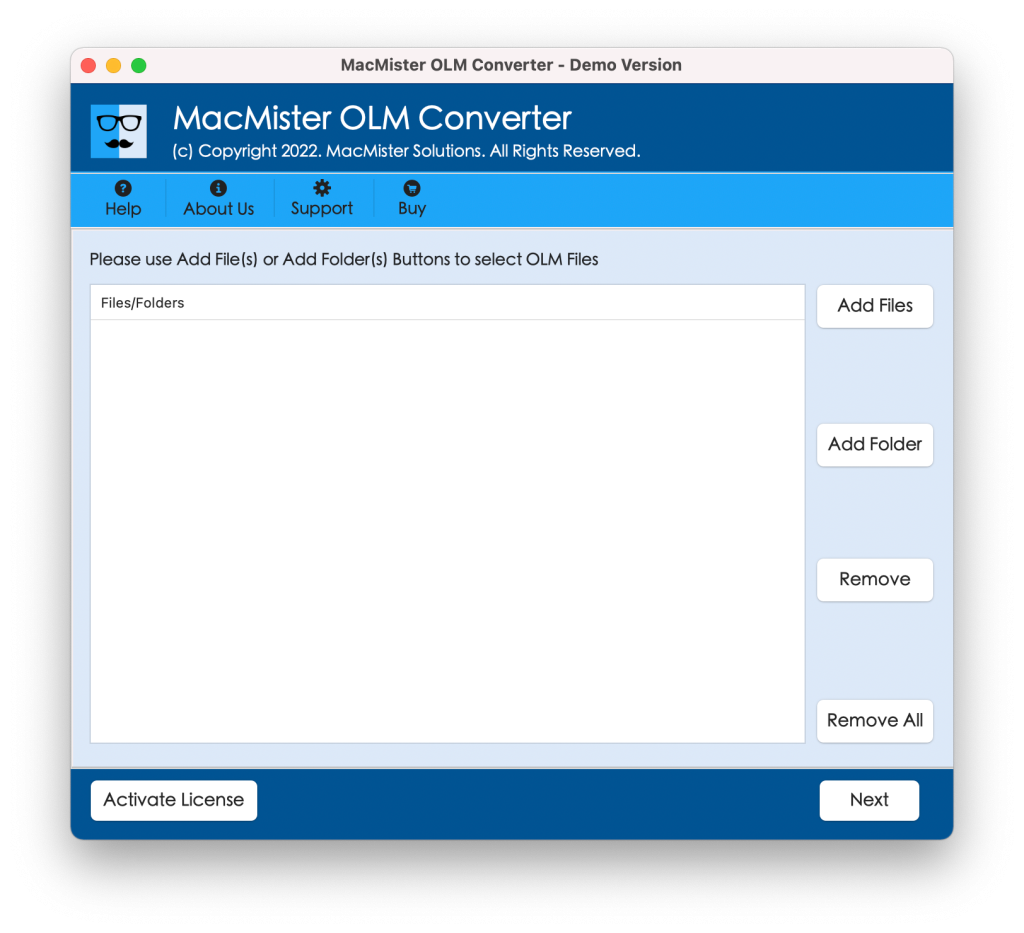
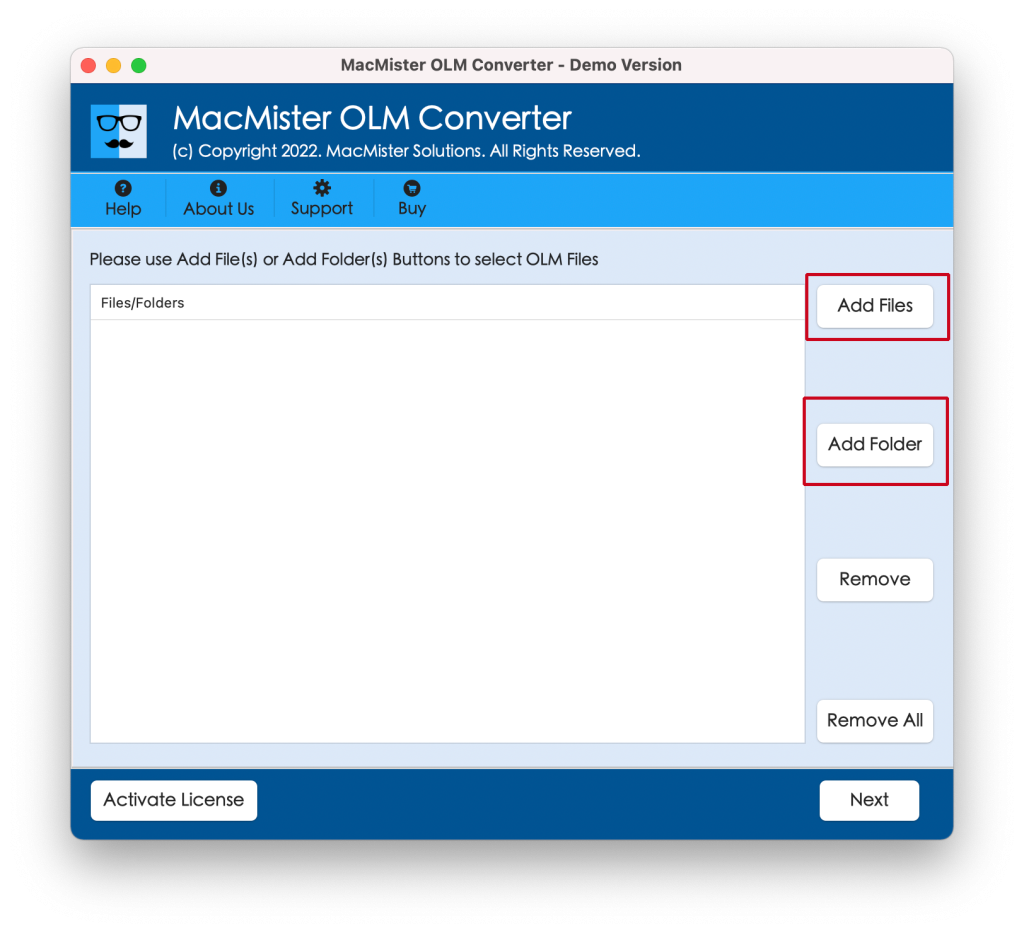
Step 2. From the right software pane, utilize Add File(s)/Add Folder options to load .olm files on the application. The Add File(S) option facilitate users to add only the important .olm files on the software and the Add Folder will help users adding a folder holding unlimited .olm files on the tool. Click Next button to proceed.
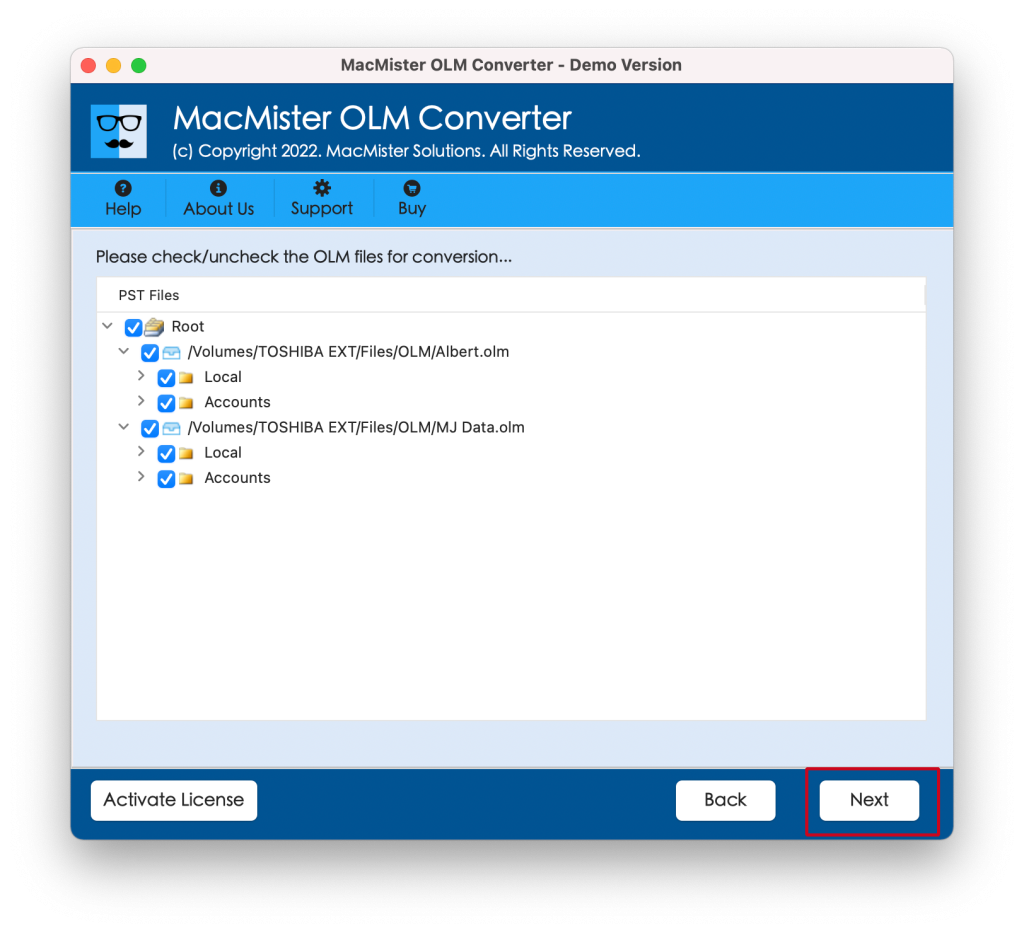
Step 3. Now, the tool will display chosen files on the panel with checkboxes. Users can make use of the checkboxes if they have a need to import selected OLM files to Zoho Mail. Click Next to proceed.
Step 4. Go to Select Saving Options to select IMAP saving type from the list.
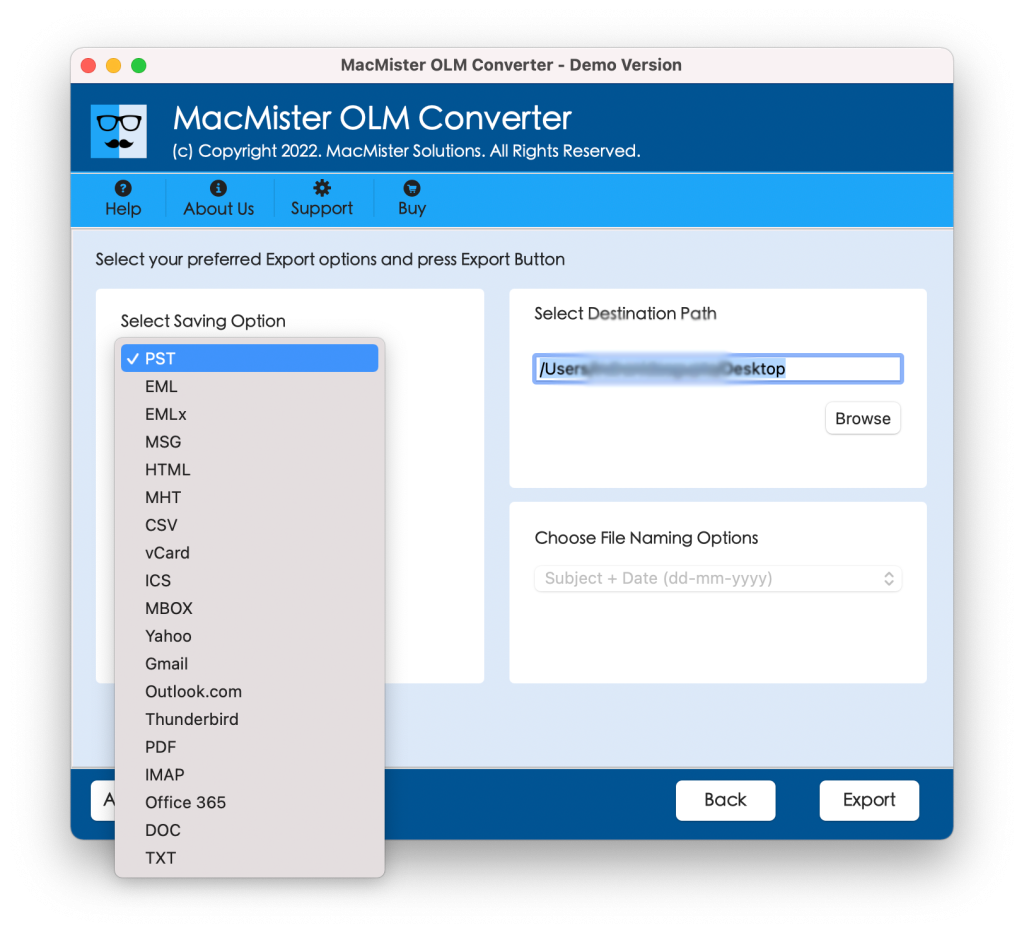
Step 5. Specify Zoho Mail credentials, IMAP host & port number in required fields. Then, click Export.
Step 6. The Live Conversion Report window showing live import status of OLM files to users.
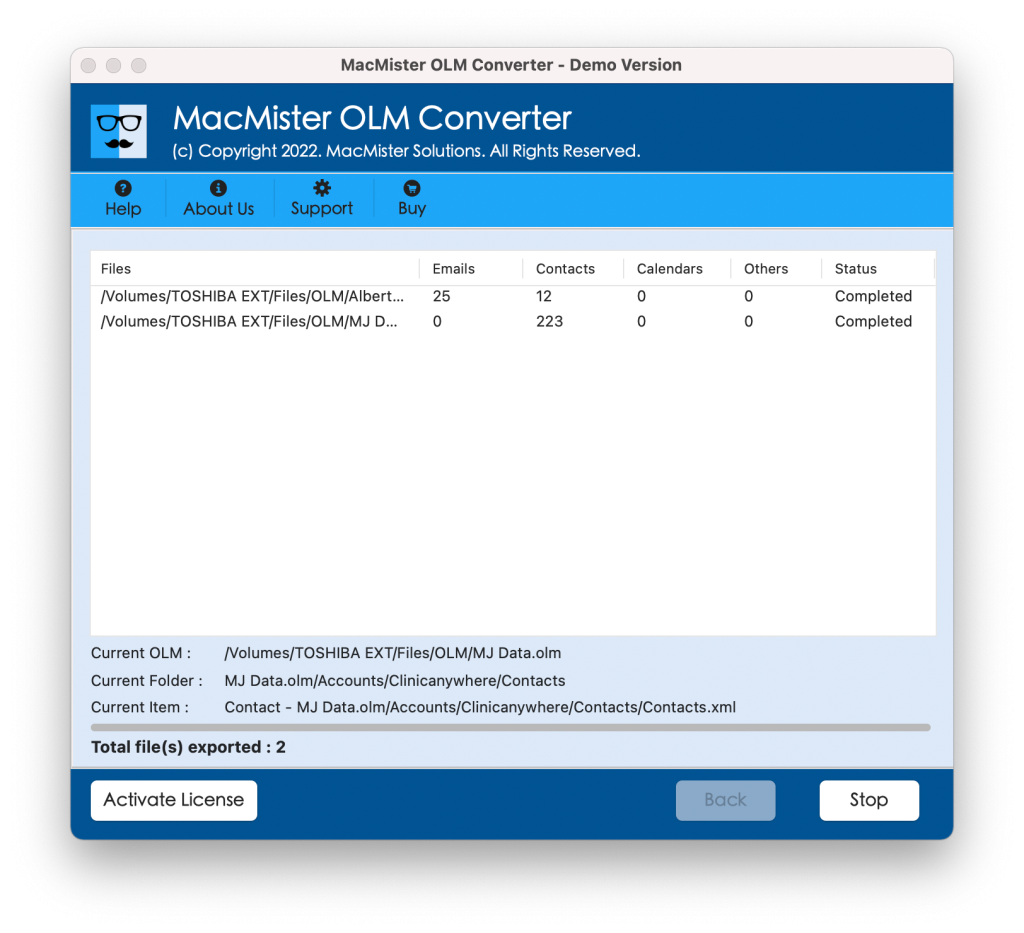
Within seconds, the entire import task will finish and then “Conversion Completed” notification will appear on the screen. Press OK button and then login to Zoho Mail account to check imported files. However, you will see that the tool has perfectly imported OLM files to Zoho Mail account. All the emails of OLM file will appear correctly in Zoho Mail account. The content and data integrity of every OLM email message will be 100% accurate.
Epilogue
In the write-up, we have offered two different ways to import OLM to Zoho Mail on Mac OS. The manual procedure is free to use but could consume users’ lot of time and energy. It will be complicated for non-technical users. The direct solution is secure and very simple. It can be utilized by anyone effortlessly. Moreover, it has the ability to batch import OLM to Zoho Mail at once. The application has plentiful features which allow users importing OLM files to Zoho Mail according to the requirements. Download the freeware version of the tool to check the process of the same in detail. One can even import 25 OLM files to Zoho Mail free of cost.