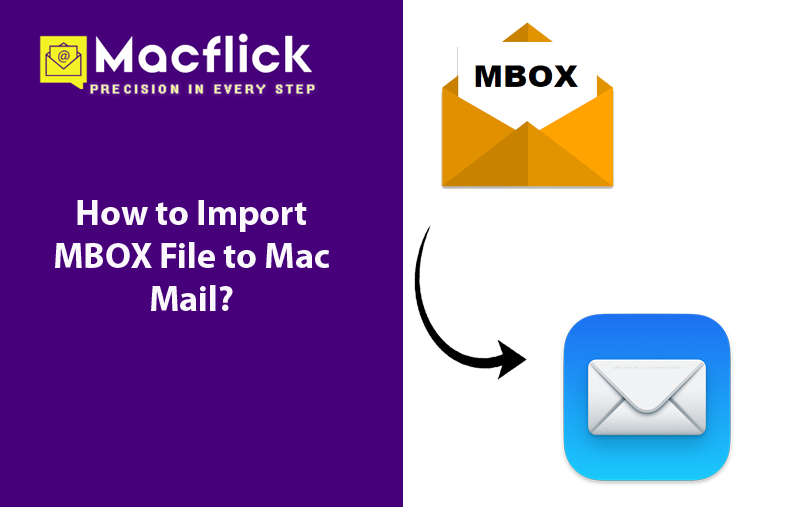
How to Import MBOX File to Mac Mail?
The article here highlighted variety of remarkable methods that allow users to import MBOX file to Mac Mail with precise emails and attachments. Here, you will discover manual and professional approaches that not only enable users to import MBOX to Mac Mail but also help executing many activities simultaneously. Continue further to understand everything that you need to know about importing MBOX to Mac Mail.
MBOX file is a versatile file type which is compatible with many email applications such as Apple Mail, Entourage, Thunderbird, and Opera Mail. Although MBOX files can extracted from any email account but importing them into Mac Mail is quite straightforward. Within few easy steps, one will be able to import MBOX file to Mac Mail. And in order to make you aware of a solution for the same, we have discussed list of possible procedures. It is recommended to review the steps to complete the whole task efficiently.
Method 1. Manual Way to Import MBOX File to Mac Mail
Step 1. Run Apple Mail on your Mac.
Step 2. Go to File and tap Import Mailboxes from the menu to load MBOX file.
Step 3. Import Wizard will open, there will be multiple options, choose “Files in MBOX Format” and click Continue.
Step 4. Choose a folder carrying list of MBOX files.
Step 5. If Import an MBOX file is selected, then the entire content of the email messages will be transferred. Also, the duration of import process is basically dependent on the size of MBOX file.
Step 6. Once the import process completes, a confirmation notification will appear on the screen. Lastly, tap Finish button. The import messages will be saved in a new Import named folder.
Step 7. Messages will be accessed from a new Import folder once the import is done successfully.
Step 8. After clicking the new imported Import folder, all its messages will list on the screen. You may tap required email message to verify the content.
These steps have provided the detailed idea of how to manually import MBOX to Mac Mail. Even though it looks simple but it is not as it seems. There are numerous factors involved which one should examine. You might not able to immediately import MBOX files if the file doesn’t have appropriate .mbox extension. Also, the process could take the entire data, even a technical familiarity is must to import MBOX files manually. And novice users will definitely not able execute the same as the steps are lengthy and require in-depth knowledge of Apple Mail.
Method 2. Direct Way to Import MBOX to Mac Mail
The Macflix Mac MBOX Converter is a most effective technique to import MBOX files into Mac Mail email application. The program has the ability to convert single as well as bulk MBOX files with accurate emails and attachments. This can be carried out with the help of dual buttons present on the screen i.e. Add File(s) and Add Folder. By utilizing these buttons, users will be able to add their important MBOX files on the tool. Besides, a friendly environment will allow all types of users to utilize the app effortlessly and import MBOX files with ease.
Moreover, the application is designed with wide ranging features with the help of users can import MBOX to Mac Mail according to the requirements. However, you may use the trial edition of the application to understand the software working in detail for free.
Step-by-Step Process to Import MBOX to Mac Mail on Mac
Step 1. Download and run the application on your Mac.
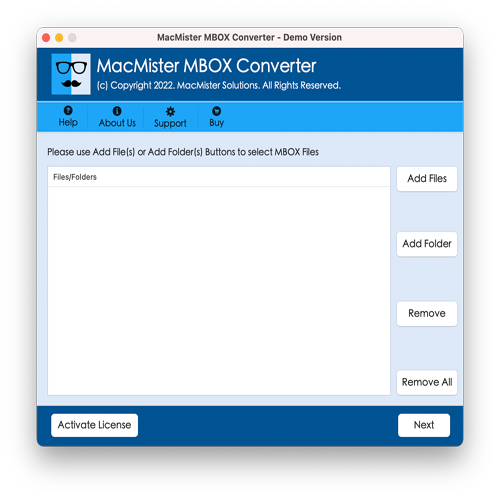
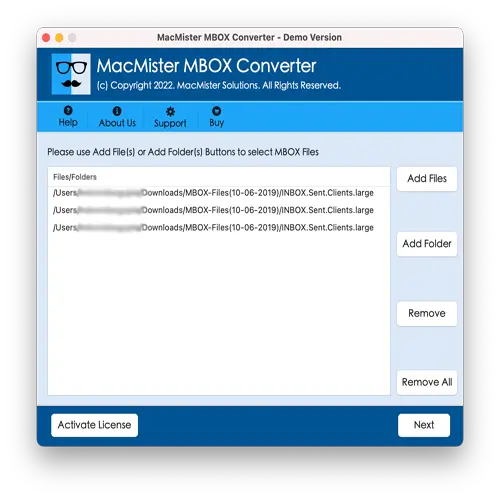
Step 2. Take help of dual buttons such as Add File(s)/Add Folder to load MBOX files on the tool. The Add File(s) button will help in adding the required .mbox files on the application and the Add Folder button allows uploading a folder of multiple .mbox files on the software for conversion. Click Next to proceed.
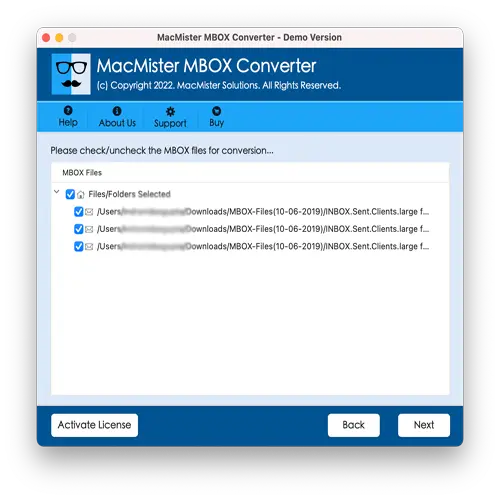
Step 3. Now, the tool will immediately start listing MBOX files with checkboxes one-by-one. However, one may utilize checkboxes to import only the selected files, if needed. Otherwise select all the checkboxes and press Next.
Step 4. Choose EMLx saving type by tapping Select Saving Options drop-down arrow.
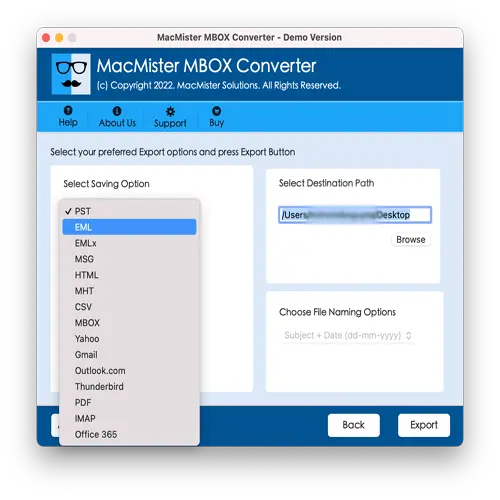
Step 5. Apply the options appearing as per your necessities and click Export button.
Step 6. The Live Conversion Report screen will be shown to users which gives the details of the ongoing conversion status of MBOX files.
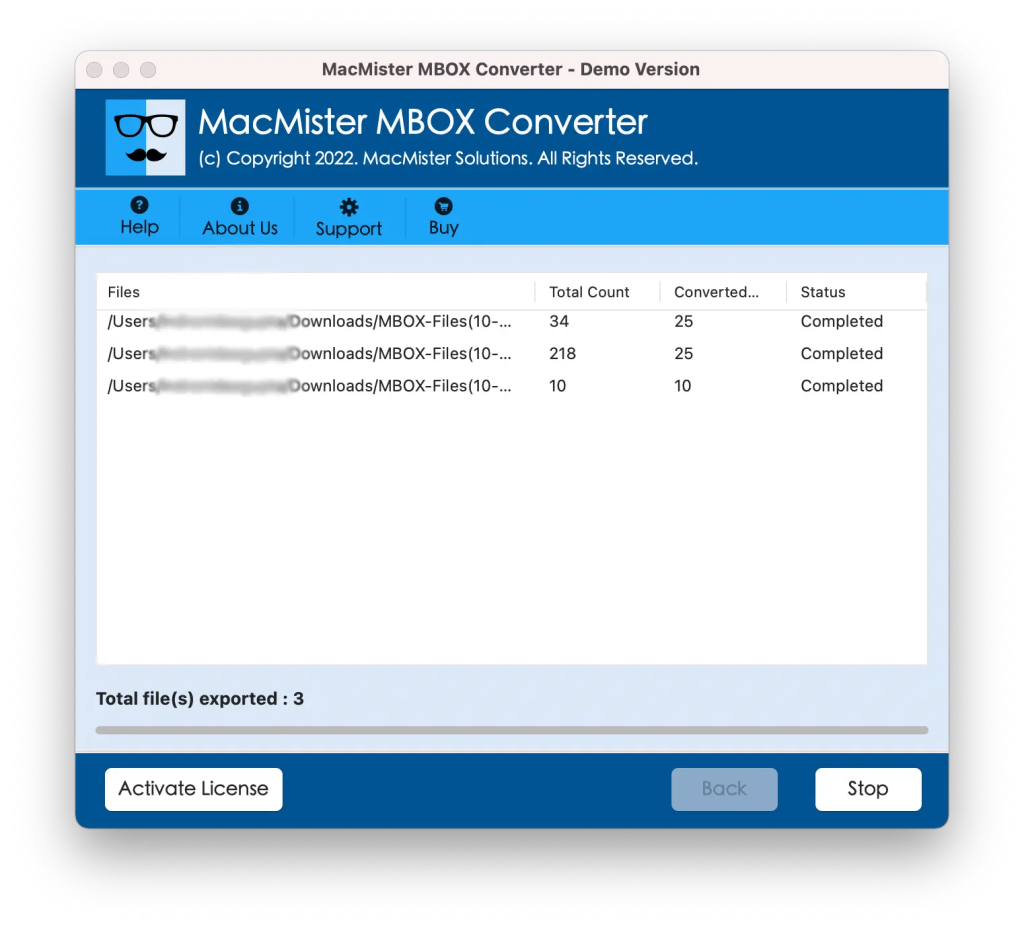
In few seconds, the process will be completed and then “Conversion Completed” notification will display. Click OK and import .emlx files in Mac Mail. However, you will see that the tool has correctly implemented the process. The content and layout of all the email messages will be precise.
Epilogue
The write-up here provided multiple ways to fix how to import MBOX file to Mac Mail on Mac. The first method is manual, free to use but time-consuming. The steps are technical, so users require technical assistance to manage it. Additionally, one cannot send MBOX files to Mac Mail right away. There are plentiful steps in-between. The second one is direct, reliable, and secure. It is easy to use and provides only three clicks which will save time and efforts. Also, remarkable features will help users importing MBOX files to Mac Mail according to the requirements. One may even utilize its free demo edition to test the software working for free. It also enable users to import first 25 MBOX emails with attachments to Mac Mail free of cost.