How to Import OLM to Office 365 on Mac?
Wanting to move OLM files into Outlook 365 on Mac but facing trouble in doing so? Wondering how to import OLM to Office 365 on Mac with emails and attachments correctly? Looking for an effective and simple approach for the same? Not to worry at all as in the blog, we have discussed a solution that will help users importing OLM to Office 365 on Mac directly with precise emails and attachments. But before that, let us explore the reasons responsible behind the import process.
Why Users Need to Import OLM to Office 365 on Mac?
There are several reasons that tells why it is import OLM files to Office 365 on Mac. Few of them are mentioned here –
- OLM file includes important emails, calendars, contacts, and more and importing makes sure that OLM database remain protected.
- Office 365 stores data files on cloud that users can access easily from anywhere anytime.
- Transferring OLM files to Office 365 helps backing up the data with complete safety and protect the same from troubles related to local storage.
- Office 365 supports seamless integration with other Microsoft tools that helps improving the workflow as well as collaboration.
- Microsoft 365 offers constant updates and features, ensuring that the data remains maintained for future.
How to Import OLM to Office 365 on Mac?
Multiple ways are available to import OLM file to Office 365. So, below are the top methods highlighted with the help of one can easily implement the import process within seconds.
Method 1. Manual Approach to Import OLM to Office 365 on Mac
Outlook for Mac possesses an inbuilt method that will help importing OLM files to Office 365 on Mac. Follow the steps discussed here to perform the process manually –
Step 1. Sign-in to Google Mail account to enable IMAP.
Step 2. Configure Gmail account in Mac Outlook.
Step 3. Import OLM to Mac Outlook if the email account does not have any.
Step 4. Generate Gmail label and copy OLM file data to Gmail labels.
Step 5. Now, configure the same Gmail profile in Windows Outlook.
Step 6. Afterwards, use the Import/Export option to export the imported .olm files from IMAP account into PST.
Now, make use of Network Upload or Drive Shipping methods to import PST file to Office 365 account.
Although, the process is free but it has some limitations which users must consider before executing it.
Limitations
- Users will be able to import only the emails from OLM to Office 365 on Mac.
- Possibility of data loss.
- Lengthy and complex steps.
- Method will not preserve data integrity when transferring OLM files.
Therefore, it is advised to opt automated solution to import OLM files to Office 365 on Mac.
Method 2. Direct Approach to Import OLM to Office 365 on Mac
The direct method to import OLM to Office 365 on Mac is by using Macflick Mac OLM Converter Tool. The application is user-friendly, secure, and powerful. It holds intuitive interface which is easily manageable by both professional and non-professional users. The tool allow users to choose Office 365 saving type from Select Saving Options, then add the credentials and import OLM files directly to Office 365 account without hassle.
Furthermore, the software provides exceptional features that allow users to carry out the import process according to the requirements. Download the trial edition of the application to check the process deeply.
Follow the Steps to Import OLM to Office 365 on Mac
Step 1. Download and run the app on your Mac.
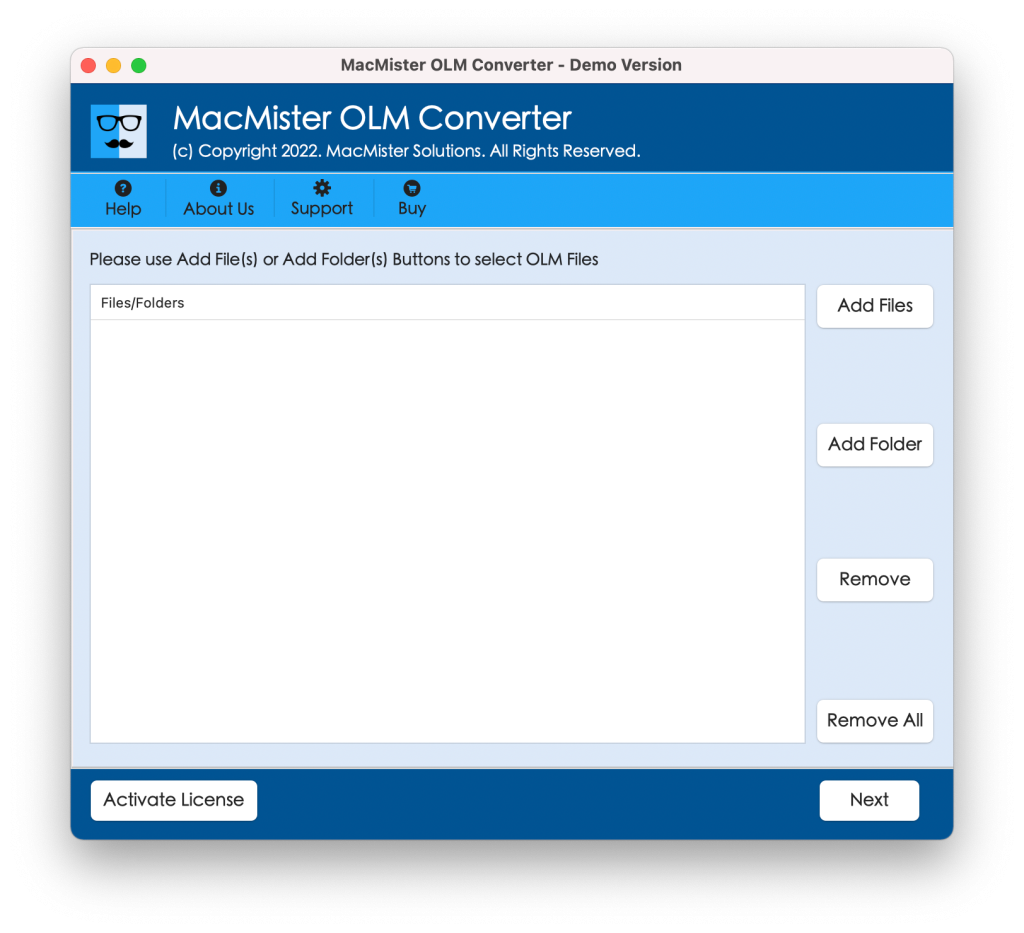
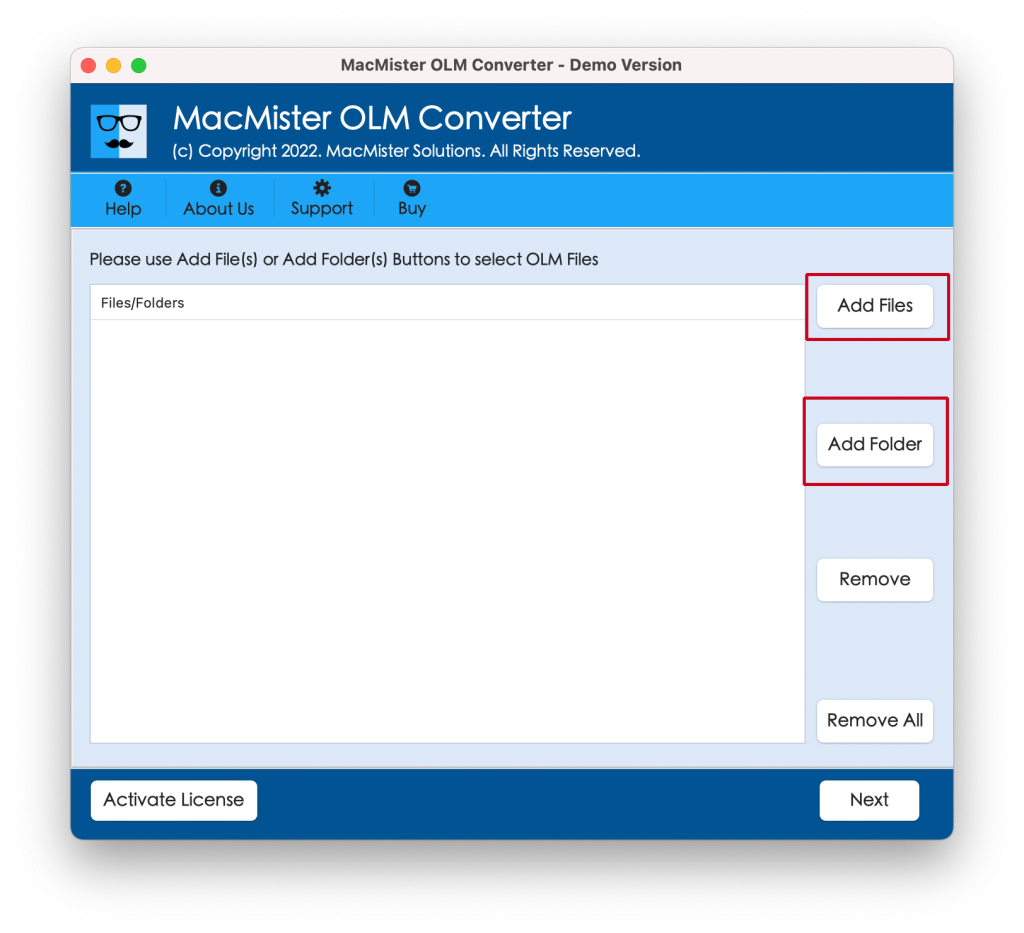
Step 2. Add OLM files with the help of Add File(s)/Add Folder buttons. Click Next.
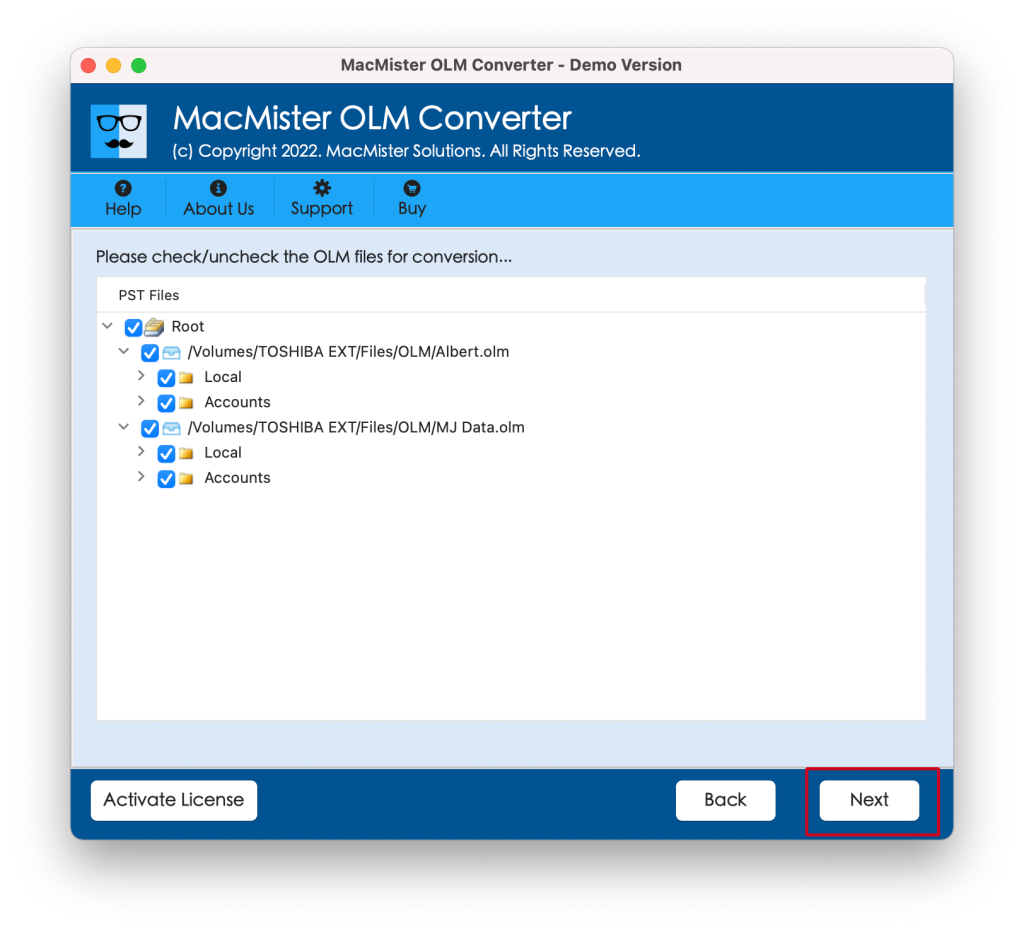
Step 3. The tool start listing OLM files one-by-one with checkboxes. Use the checkboxes to import selected files, if needed and then click Next.
Step 4. Go to Select Saving Options and select Office 365 from the drop-down menu.
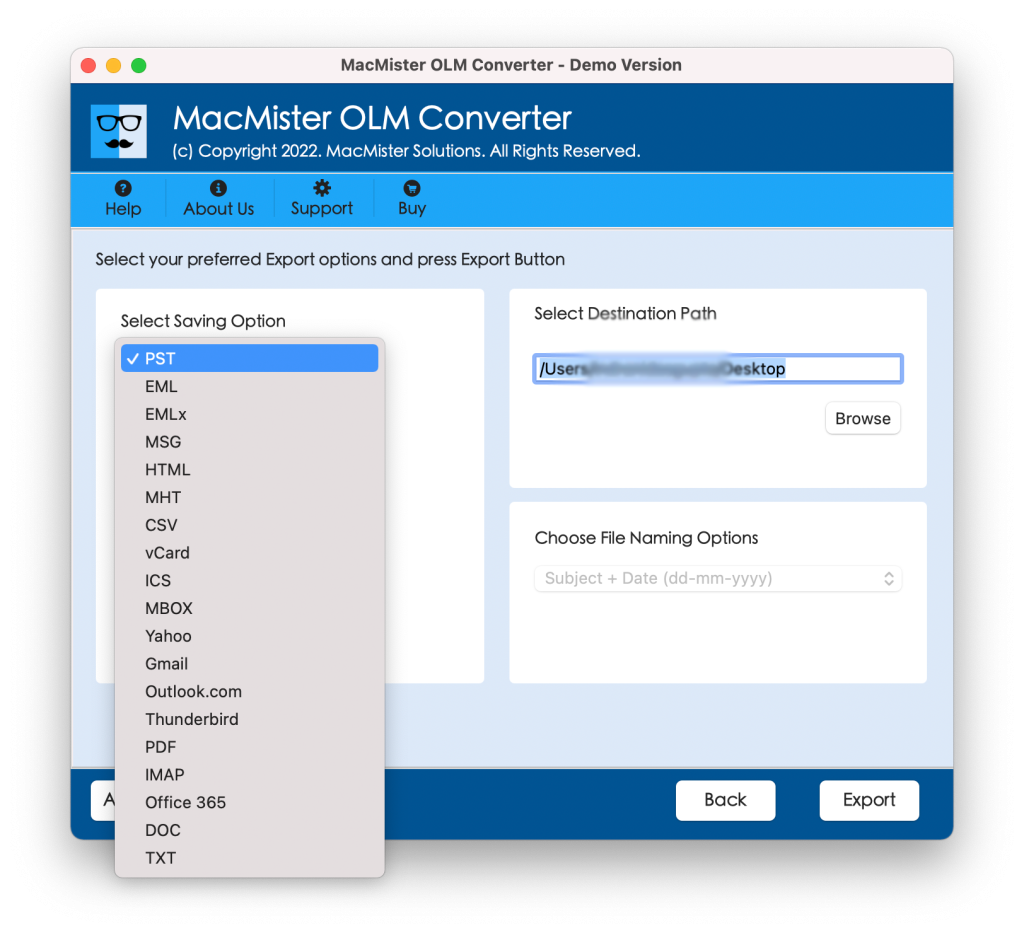
Step 5. Add Office 365 login details and click Export button.
Step 6. The app generates Live Conversion Report which shows the live import progress of OLM files to users.
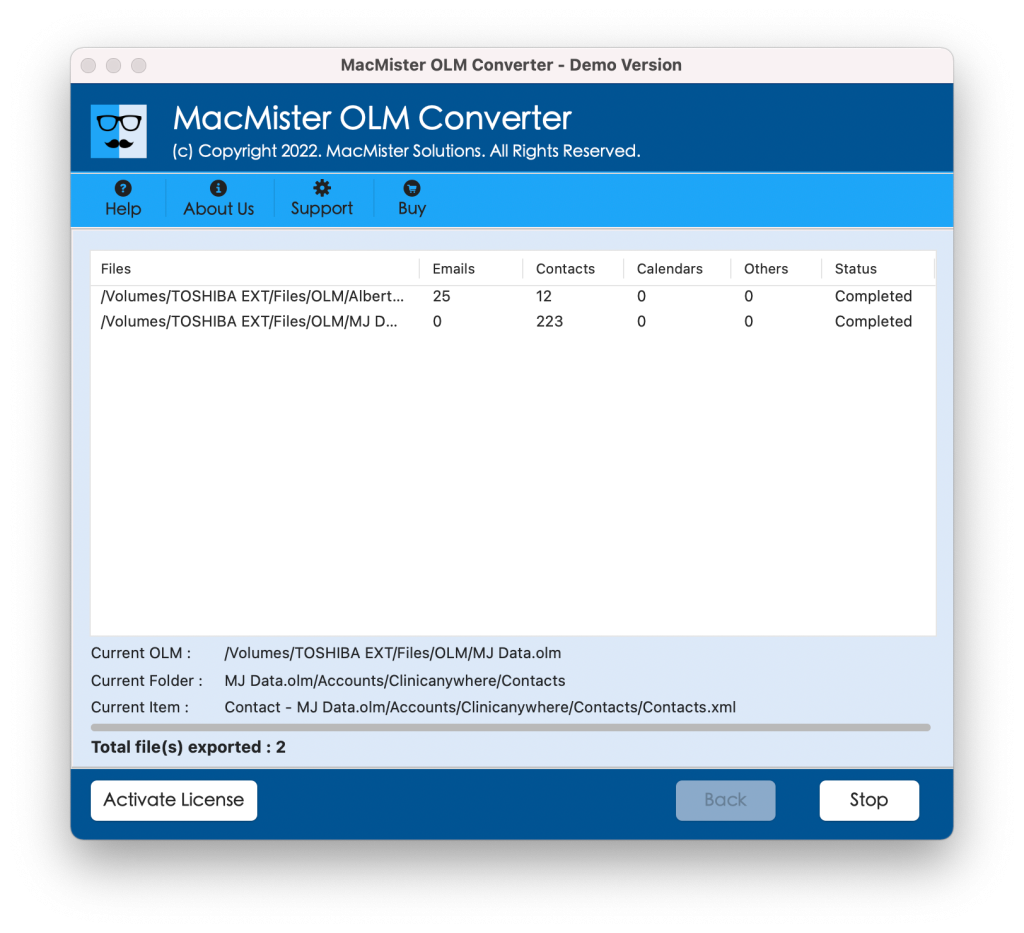
In few seconds, the process will end with a notification confirming that the tool has successfully completed the process. Click OK and then login to Office 365 account to view resultant files. However, after opening the desired imported file, you will see that the tool has accurately imported OLM files to Office 365 account. All the emails and other database will appear precise.
Overall, it is a perfect direct way to import OLM to Office 365 on Mac OS.
Epilogue
The write-up here highlighted multiple ways to fix how to import OLM to Office 365 on Mac. The first method is manual and is free to use but lengthy and time-consuming. It has many limitations. So, it is advised to go for automated approach. The automated solution is direct, secure, and reliable. Both technical and non-technical users can use it and perform the process easily. Moreover, the app contains numerous features with the help of users can import OLM files according to the requirements. Download the trial edition to understand the process in detail. It also allows to import first 25 OLM files free of cost.